Classification model#
This live example shows how to easily train, validate, optimize and export classification model on the flowers dataset from TensorFlow. To learn more about Classification task, refer to Classification.
Note
To learn deeper how to manage training process of the model including additional parameters and its modification, refer to Classification model.
The process has been tested on the following configuration.
Ubuntu 20.04
NVIDIA GeForce RTX 3090
Intel(R) Core(TM) i9-10980XE
CUDA Toolkit 11.8
Note
While this example shows how to work with multi-class classification, it is easy to extend it for the multi-label or hierarchical classification. Substitute the dataset with a multi-label or hierarchical one. Everything else remains the same.
Setup virtual environment#
1. You can follow the installation process from a quick start guide to create a universal virtual environment for OpenVINO™ Training Extensions.
2. Activate your virtual environment:
.otx/bin/activate
. venv/otx/bin/activate
Dataset preparation#
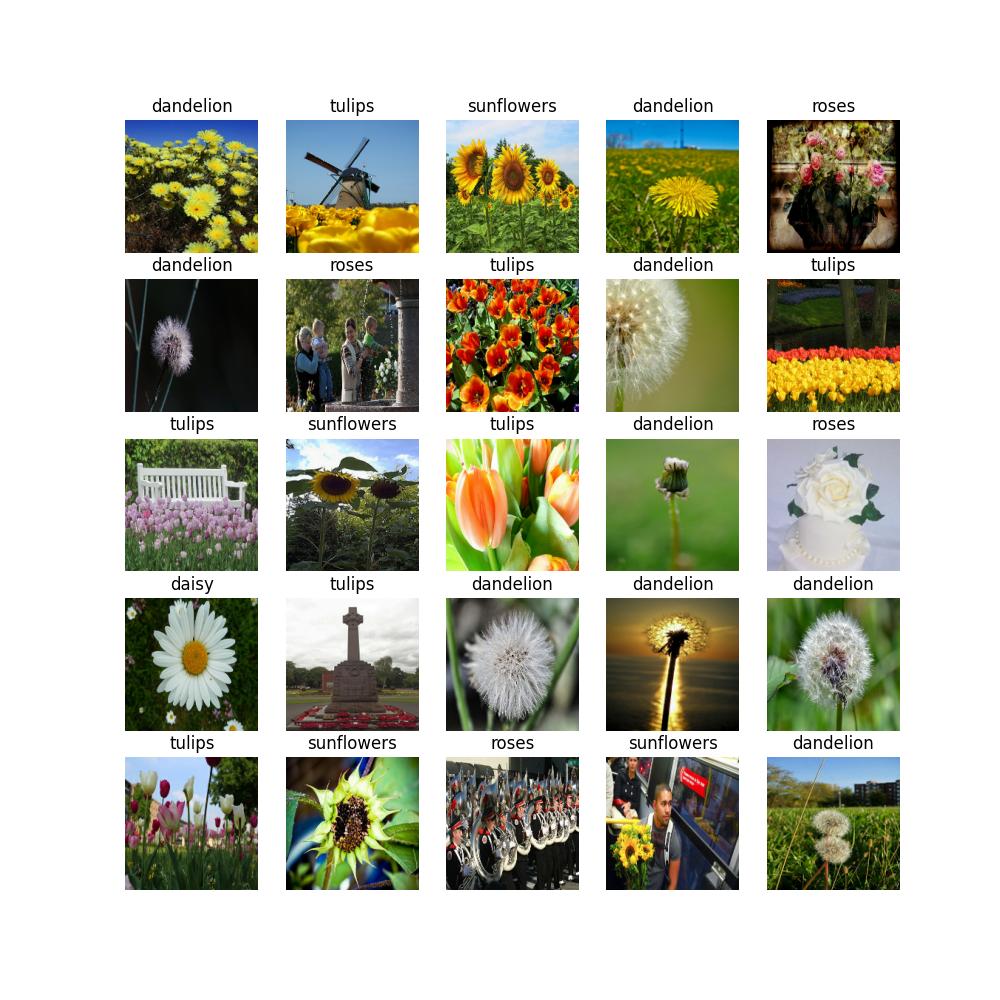
Download and prepare a flowers dataset with the following command:
To prepare the classification dataset, need to make the directory for the train/validation and test. Since this is just example, we’ll use the same train/val/test datasets.
cd data

# download and unzip the data
wget http://download.tensorflow.org/example_images/flower_photos.tgz
tar -xzvf flower_photos.tgz

# construct the data structure to insert to the OTX
cd flower_photos
mkdir train
mv daisy dandelion roses sunflowers tulips train
cp -r train val
cp -r train test

# move the original directory
cd ../..
Then the final dataset directory likes below, please keep the exact same name for the train/val/test folder, to identify the dataset.
flower_photos
  train
    ├── daisy
    ├── dandelion
    ├── roses
    ├── sunflowers
    ├── tulips
  val
    ├── daisy
    ├── ...
  test
    ├── daisy
    ├── ...
Training#
1. First of all, you need to choose which classification model you want to train. The list of supported recipes for classification is available with the command line below.
Note
The characteristics and detailed comparison of the models could be found in Explanation section.
(otx) ...$ otx find --task MULTI_CLASS_CLS
┏━━━━━━━━━━━━━━━━━┳━━━━━━━━━━━━━━━━━━━━━━━━━━┳━━━━━━━━━━━━━━━━━━━━━━━━━━━━━━━━━━━━━━━━━━━━━━━━━━━━━━━━━━━━━━━━━━━━━━━━━━━━━━━━┓
┃ Task            ┃ Model Name               ┃ Recipe Path                                                                    ┃
┡━━━━━━━━━━━━━━━━━╇━━━━━━━━━━━━━━━━━━━━━━━━━━╇━━━━━━━━━━━━━━━━━━━━━━━━━━━━━━━━━━━━━━━━━━━━━━━━━━━━━━━━━━━━━━━━━━━━━━━━━━━━━━━━┩
│ MULTI_CLASS_CLS │ openvino_model           │ src/otx/recipe/classification/multi_class_cls/openvino_model.yaml              │
│ MULTI_CLASS_CLS │ tv_efficientnet_b0       │ src/otx/recipe/classification/multi_class_cls/tv_efficientnet_b0.yaml          │
│ MULTI_CLASS_CLS │ tv_resnet_50             │ src/otx/recipe/classification/multi_class_cls/tv_resnet_50.yaml                │
│ MULTI_CLASS_CLS │ efficientnet_v2_light    │ src/otx/recipe/classification/multi_class_cls/efficientnet_v2_light.yaml       │
│ MULTI_CLASS_CLS │ tv_efficientnet_b3       │ src/otx/recipe/classification/multi_class_cls/tv_efficientnet_b3.yaml          │
│ MULTI_CLASS_CLS │ efficientnet_b0_light    │ src/otx/recipe/classification/multi_class_cls/efficientnet_b0_light.yaml       │
│ MULTI_CLASS_CLS │ tv_efficientnet_v2_l     │ src/otx/recipe/classification/multi_class_cls/tv_efficientnet_v2_l.yaml        │
│ MULTI_CLASS_CLS │ tv_efficientnet_b1       │ src/otx/recipe/classification/multi_class_cls/tv_efficientnet_b1.yaml          │
│ MULTI_CLASS_CLS │ tv_mobilenet_v3_small    │ src/otx/recipe/classification/multi_class_cls/tv_mobilenet_v3_small.yaml       │
│ MULTI_CLASS_CLS │ otx_mobilenet_v3_large   │ src/otx/recipe/classification/multi_class_cls/otx_mobilenet_v3_large.yaml      │
│ MULTI_CLASS_CLS │ otx_deit_tiny            │ src/otx/recipe/classification/multi_class_cls/otx_deit_tiny.yaml               │
│ MULTI_CLASS_CLS │ tv_efficientnet_b4       │ src/otx/recipe/classification/multi_class_cls/tv_efficientnet_b4.yaml          │
│ MULTI_CLASS_CLS │ otx_efficientnet_v2      │ src/otx/recipe/classification/multi_class_cls/otx_efficientnet_v2.yaml         │
│ MULTI_CLASS_CLS │ mobilenet_v3_large_light │ src/otx/recipe/classification/multi_class_cls/mobilenet_v3_large_light.yaml    │
│ MULTI_CLASS_CLS │ otx_efficientnet_b0      │ src/otx/recipe/classification/multi_class_cls/otx_efficientnet_b0.yaml         │
│ MULTI_CLASS_CLS │ otx_dino_v2              │ src/otx/recipe/classification/multi_class_cls/otx_dino_v2.yaml                 │
│ MULTI_CLASS_CLS │ otx_dino_v2_linear_probe │ src/otx/recipe/classification/multi_class_cls/otx_dino_v2_linear_probe.yaml    │
└─────────────────┴──────────────────────────┴────────────────────────────────────────────────────────────────────────────────┘
from otx.engine.utils.api import list_models

model_lists = list_models(task="MULTI_CLASS_CLS", pattern="*efficient")
print(model_lists)
'''
[
  'efficientnet_b0',
  'efficientnet_v2_light',
  'efficientnet_b0_light',
  ...
]
'''
1. On this step we will prepare custom configuration with:
all necessary configs for otx_efficientnet_b0
train/validation sets, based on provided annotation.
It may be counterintuitive, but for --data_root we need to pass the path to the dataset folder root (in our case it’s data/flower_photos) instead of the folder with validation images.
This is because the function automatically detects annotations and images according to the expected folder structure we achieved above.
Let’s check the multi-class classification configuration running the following command:
(otx) ...$ otx train --config src/otx/recipe/classification/multi_class_cls/mobilenet_v3_large.yaml  --data_root data/flower_photos --print_config

...
data_root: data/flower_photos
work_dir: otx-workspace
callback_monitor: val/accuracy
disable_infer_num_classes: false
engine:
  task: MULTI_CLASS_CLS
  device: auto
data:
...
Note
If you want to get configuration as yaml file, please use --print_config parameter and > configs.yaml.
(otx) ...$ otx train --config  src/otx/recipe/classification/multi_class_cls/otx_mobilenet_v3_large.yaml --data_root data/flower_photos --print_config > configs.yaml
# Update configs.yaml & Train configs.yaml
(otx) ...$ otx train --config configs.yaml
3. otx train trains a model (a particular model recipe)
on a dataset and results:
Here are the main outputs can expect with CLI:
- {work_dir}/{timestamp}/checkpoints/epoch_*.ckpt - a model checkpoint file.
- {work_dir}/{timestamp}/configs.yaml - The configuration file used in the training can be reused to reproduce the training.
- {work_dir}/.latest - The results of each of the most recently executed subcommands are soft-linked. This allows you to skip checkpoints and config file entry as a workspace.
(otx) ...$ otx train --data_root data/flower_photos
(otx) ...$ otx train --config src/otx/recipe/classification/multi_class_cls/mobilenet_v3_large.yaml --data_root data/flower_photos
from otx.engine import Engine

data_root = "data/flower_photos"
recipe = "src/otx/recipe/classification/multi_class_cls/mobilenet_v3_large.yaml"

engine = Engine.from_config(
          config_path=recipe,
          data_root=data_root,
          work_dir="otx-workspace",
        )

engine.train(...)
from otx.engine import Engine

data_root = "data/flower_photos"

engine = Engine(
          model="otx_mobilenet_v3_large",
          data_root=data_root,
          work_dir="otx-workspace",
        )

engine.train(...)
4. (Optional) Additionally, we can tune training parameters such as batch size, learning rate, patience epochs or warm-up iterations.
Learn more about specific parameters using otx train --help -v or otx train --help -vv.
For example, to decrease the batch size to 4, fix the number of epochs to 100, extend the command line above with the following line.
(otx) ...$ otx train ... --data.train_subset.batch_size 4 \
                         --max_epochs 100
from otx.core.config.data import SubsetConfig
from otx.core.data.module import OTXDataModule
from otx.engine import Engine

datamodule = OTXDataModule(..., train_subset=SubsetConfig(..., batch_size=4))

engine = Engine(..., datamodule=datamodule)

engine.train(max_epochs=100)
5. The training result checkpoints/*.ckpt file is located in {work_dir} folder,
while training logs can be found in the {work_dir}/{timestamp} dir.
Note
We also can visualize the training using Tensorboard as these logs are located in {work_dir}/{timestamp}/tensorboard.
otx-workspace
├── 20240403_134256/
    ├── csv/
    ├── checkpoints/
    |   └── epoch_*.pth
    ├── tensorboard/
    └── configs.yaml
└── .latest
    └── train/
...
The training time highly relies on the hardware characteristics, for example on 1 NVIDIA GeForce RTX 3090 the training took about 3 minutes.
After that, we have the PyTorch multi-class classification model trained with OpenVINO™ Training Extensions, which we can use for evaluation, export, optimization and deployment.
Evaluation#
1. otx test runs evaluation of a
trained model on a particular dataset.
Test function receives test annotation information and model snapshot, trained in previous step.
The default metric is accuracy measure.
2. That’s how we can evaluate the snapshot in otx-workspace
folder on flower_photos dataset and save results to otx-workspace:
(otx) ...$ otx test --work_dir otx-workspace
┏━━━━━━━━━━━━━━━━━━━━━━━━━━━┳━━━━━━━━━━━━━━━━━━━━━━━━━━━┓
┃        Test metric        ┃       DataLoader 0        ┃
┡━━━━━━━━━━━━━━━━━━━━━━━━━━━╇━━━━━━━━━━━━━━━━━━━━━━━━━━━┩
│      test/data_time       │    0.9929155111312866     │
│       test/map_50         │    0.0430680550634861     │
│      test/iter_time       │    0.058606021106243134   │
└───────────────────────────┴───────────────────────────┘
(otx) ...$ otx test --config  src/otx/recipe/classification/multi_class_cls/otx_mobilenet_v3_large.yaml \
                    --data_root data/flower_photos \
                    --checkpoint otx-workspace/20240312_051135/checkpoints/epoch_014.ckpt
┏━━━━━━━━━━━━━━━━━━━━━━━━━━━┳━━━━━━━━━━━━━━━━━━━━━━━━━━━┓
┃        Test metric        ┃       DataLoader 0        ┃
┡━━━━━━━━━━━━━━━━━━━━━━━━━━━╇━━━━━━━━━━━━━━━━━━━━━━━━━━━┩
│      test/data_time       │    0.9929155111312866     │
│       test/map_50         │    0.0430680550634861     │
│      test/iter_time       │    0.058606021106243134   │
└───────────────────────────┴───────────────────────────┘
engine.test()
3. The output of {work_dir}/{timestamp}/csv/version_0/metrics.csv consists of
a dict with target metric name and its value.
Export#
1. otx export exports a trained Pytorch .pth model to the OpenVINO™ Intermediate Representation (IR) format.
It allows to efficiently run it on Intel hardware, especially on CPU, using OpenVINO™ runtime.
Also, the resulting IR model is required to run PTQ optimization in the section below. IR model contains 2 files: exported_model.xml for architecture and exported_model.bin for weights.
2. That’s how we can export the trained model {work_dir}/{timestamp}/checkpoints/epoch_*.ckpt
from the previous section and save the exported model to the {work_dir}/{timestamp}/ folder.
(otx) ...$ otx export --work_dir otx-workspace
...
Elapsed time: 0:00:02.446673
(otx) ...$ otx export ... --checkpoint otx-workspace/20240312_051135/checkpoints/epoch_014.ckpt
...
Elapsed time: 0:00:02.446673
engine.export()
3. We can check the accuracy of the IR model and the consistency between the exported model and the PyTorch model,
using otx test and passing the IR model path to the --checkpoint parameter.
(otx) ...$ otx test --work_dir otx-workspace \
                    --checkpoint otx-workspace/20240312_052847/exported_model.xml \
                    --engine.device cpu
...
┏━━━━━━━━━━━━━━━━━━━━━━━━━━━┳━━━━━━━━━━━━━━━━━━━━━━━━━━━┓
┃        Test metric        ┃       DataLoader 0        ┃
┡━━━━━━━━━━━━━━━━━━━━━━━━━━━╇━━━━━━━━━━━━━━━━━━━━━━━━━━━┩
│       test/accuracy       │    0.9931880235671997     │
│      test/data_time       │   0.018398193642497063    │
│      test/iter_time       │    0.2764030694961548     │
└───────────────────────────┴───────────────────────────┘
(otx) ...$ otx test --config src/otx/recipe/classification/multi_class_cls/otx_mobilenet_v3_large.yaml \
                    --data_root data/flower_photos \
                    --checkpoint otx-workspace/20240312_052847/exported_model.xml \
                    --engine.device cpu
...
┏━━━━━━━━━━━━━━━━━━━━━━━━━━━┳━━━━━━━━━━━━━━━━━━━━━━━━━━━┓
┃        Test metric        ┃       DataLoader 0        ┃
┡━━━━━━━━━━━━━━━━━━━━━━━━━━━╇━━━━━━━━━━━━━━━━━━━━━━━━━━━┩
│       test/accuracy       │    0.9931880235671997     │
│      test/data_time       │   0.018398193642497063    │
│      test/iter_time       │    0.2764030694961548     │
└───────────────────────────┴───────────────────────────┘
exported_model = engine.export()
engine.test(checkpoint=exported_model)
4. Optional Additionally, we can tune confidence threshold via the command line.
Learn more about recipe-specific parameters using otx export --help.
For example, If you want to get the ONNX model format you can run it like below.
(otx) ...$ otx export ... --checkpoint otx-workspace/20240312_051135/checkpoints/epoch_014.ckpt --export_format ONNX
engine.export(..., export_format="ONNX")
If you also want to export saliency_map, a feature related to explain, and feature_vector information for XAI, you can do the following.
(otx) ...$ otx export ... --checkpoint otx-workspace/20240312_051135/checkpoints/epoch_014.ckpt --explain True
engine.export(..., explain=True)
Optimization#
1. We can further optimize the model with otx optimize.
It uses PTQ depending on the model and transforms it to INT8 format.
PTQ optimization is used for models exported in the OpenVINO™ IR format. It decreases the floating-point precision to integer precision of the exported model by performing the post-training optimization.
To learn more about optimization, refer to NNCF repository.
2. Command example for optimizing OpenVINO™ model (.xml) with OpenVINO™ PTQ.
(otx) ...$ otx optimize  --work_dir otx-workspace \
                         --checkpoint otx-workspace/20240312_052847/exported_model.xml

...
Statistics collection ━━━━━━━━━━━━━━━━━━━━━━━━━━━━━━━━━━━━━━━━━━━━━━━━━━━━━━━━━━━━━━━━━━━━━━━━━━━━━━━━━━━━━━━━━━━━━━━━━━━━━━━━━━━━━━━━━━━━━━━━━━━━━━━━━━━━━━━━━━ 100% 30/30 • 0:00:14 • 0:00:00
Applying Fast Bias correction ━━━━━━━━━━━━━━━━━━━━━━━━━━━━━━━━━━━━━━━━━━━━━━━━━━━━━━━━━━━━━━━━━━━━━━━━━━━━━━━━━━━━━━━━━━━━━━━━━━━━━━━━━━━━━━━━━━━━━━━━━━━━━━━━━━ 100% 58/58 • 0:00:02 • 0:00:00
Elapsed time: 0:00:08.958733
ckpt_path = "otx-workspace/20240312_052847/exported_model.xml"
engine.optimize(checkpoint=ckpt_path)
The optimization time highly relies on the hardware characteristics, for example on Intel(R) Core(TM) i9-10980XE it took about 9 seconds. Please note, that PTQ will take some time without logging to optimize the model.
Note
You can also pass export_demo_package=True parameter to obtain exportable_code.zip archive with packed optimized model and demo package. Please refer to export tutorial.
3. Finally, we can also evaluate the optimized model by passing
it to the otx test function.
(otx) ...$ otx test --work_dir otx-workspace \
                    --checkpoint otx-workspace/20240312_055042/optimized_model.xml \
                    --engine.device cpu

...
┏━━━━━━━━━━━━━━━━━━━━━━━━━━━┳━━━━━━━━━━━━━━━━━━━━━━━━━━━┓
┃        Test metric        ┃       DataLoader 0        ┃
┡━━━━━━━━━━━━━━━━━━━━━━━━━━━╇━━━━━━━━━━━━━━━━━━━━━━━━━━━┩
│       test/accuracy       │     0.989645779132843     │
│      test/data_time       │    0.00853706430643797    │
│      test/iter_time       │    0.43554383516311646    │
└───────────────────────────┴───────────────────────────┘
Elapsed time: 0:00:16.260521
ckpt_path = "otx-workspace/20240312_055042/optimized_model.xml"
engine.test(checkpoint=ckpt_path)
Now we have fully trained, optimized and exported an efficient model representation ready-to-use multi-class classification model.